


1. Introduction
2. Basic Rules for a 3D Operator
— Realism in Size and Motion
— One Frame – One Picture
— One Frame – One Movement
— Variety of Shots
3. Shots That Tell a Story
4. Something About the Camera Structure
5. Angles That Evoke Emotion
6. Camera Movements That Set Accents
RU version is available on DTF
The camera in video production is one of the main tools of the motion designer. Much like a director shows his film through the eyes of a cameraman, any interesting idea and complex animation can be ‘killed’ by a bad camera. This is something that a lot of new 3D motion designers suffer from, because they pay a lot of attention to the action itself, animation, and shading, and leave the camera for the last.
Viewers of our videos know a good, ‘right’ camera intuitively because since childhood they have been watching movies, TV, and playing AAA games. They intuitively sense a good picture. They won’t tell exactly what’s wrong with a bad camera, but they will definitely sense that something is wrong.
Our Motion Design Department at Highcore Games has worked extensively on various 3D packages for game cinematics and commercials, but the principles of camera movement and animation are always the same. In short, our task is to replicate the work of real-life filming equipment as naturally as possible, based on the principles of cinema and the classic school of camerawork. The main thing here is to grasp the basic principles, and then it is of no importance where to implement it: at Cinema4d, Blender, 3ds max, Houdini, etc.
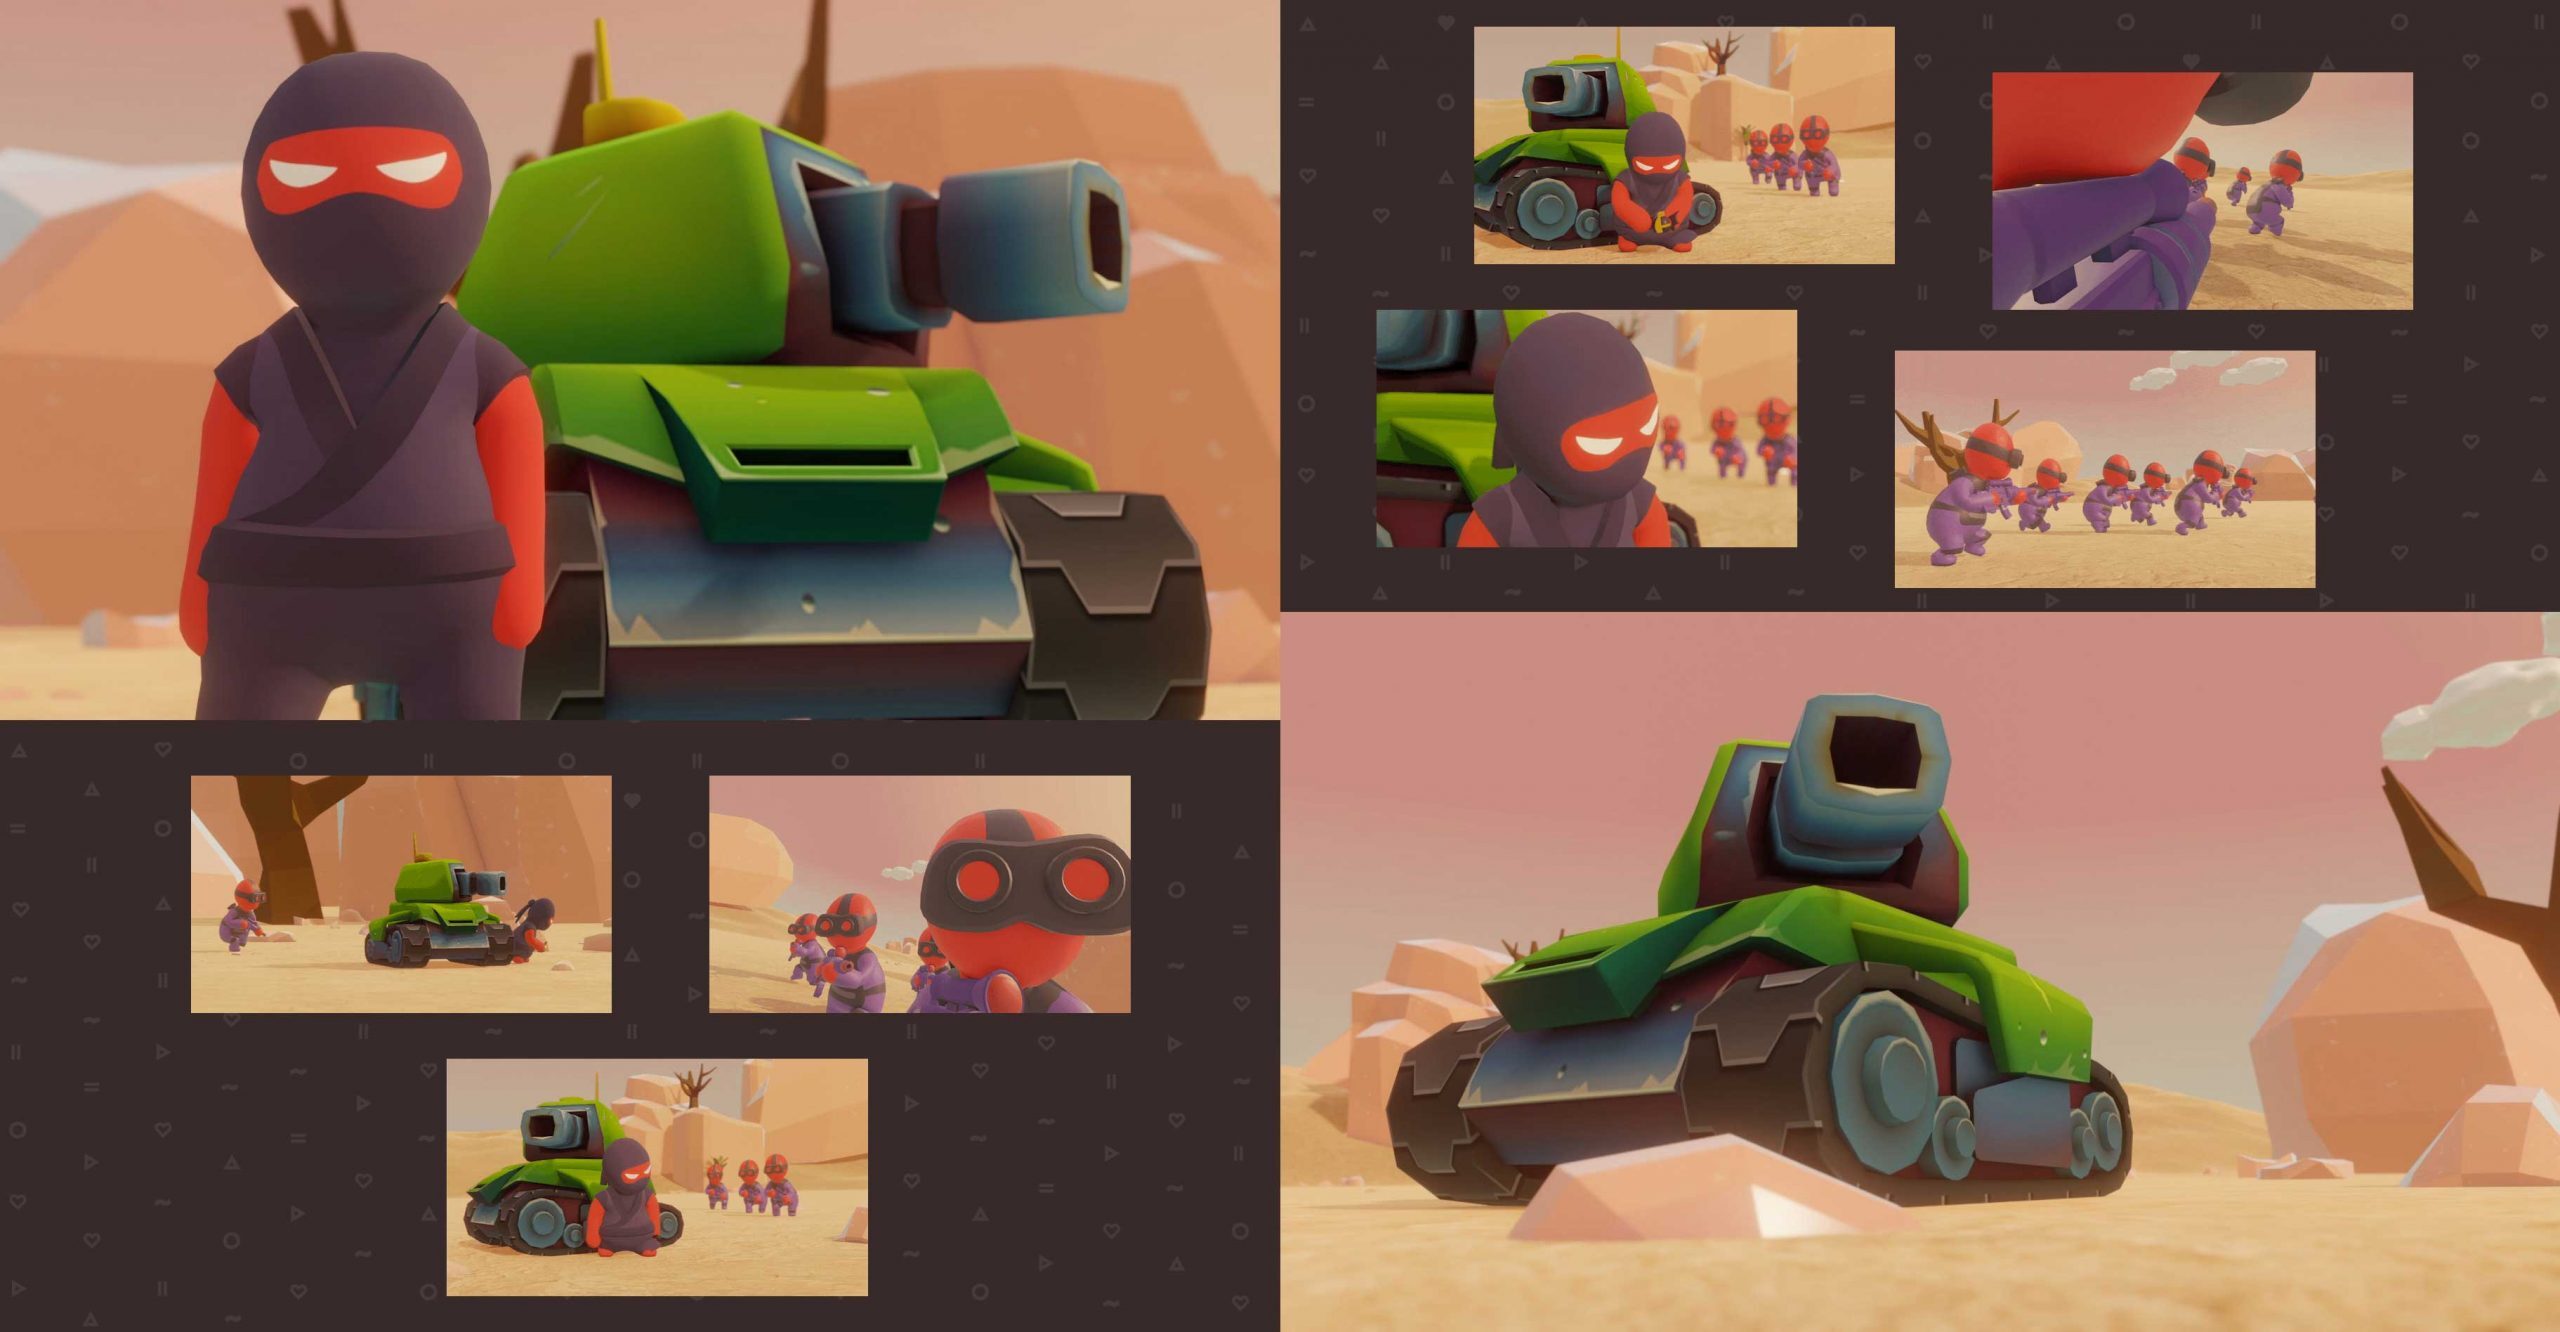
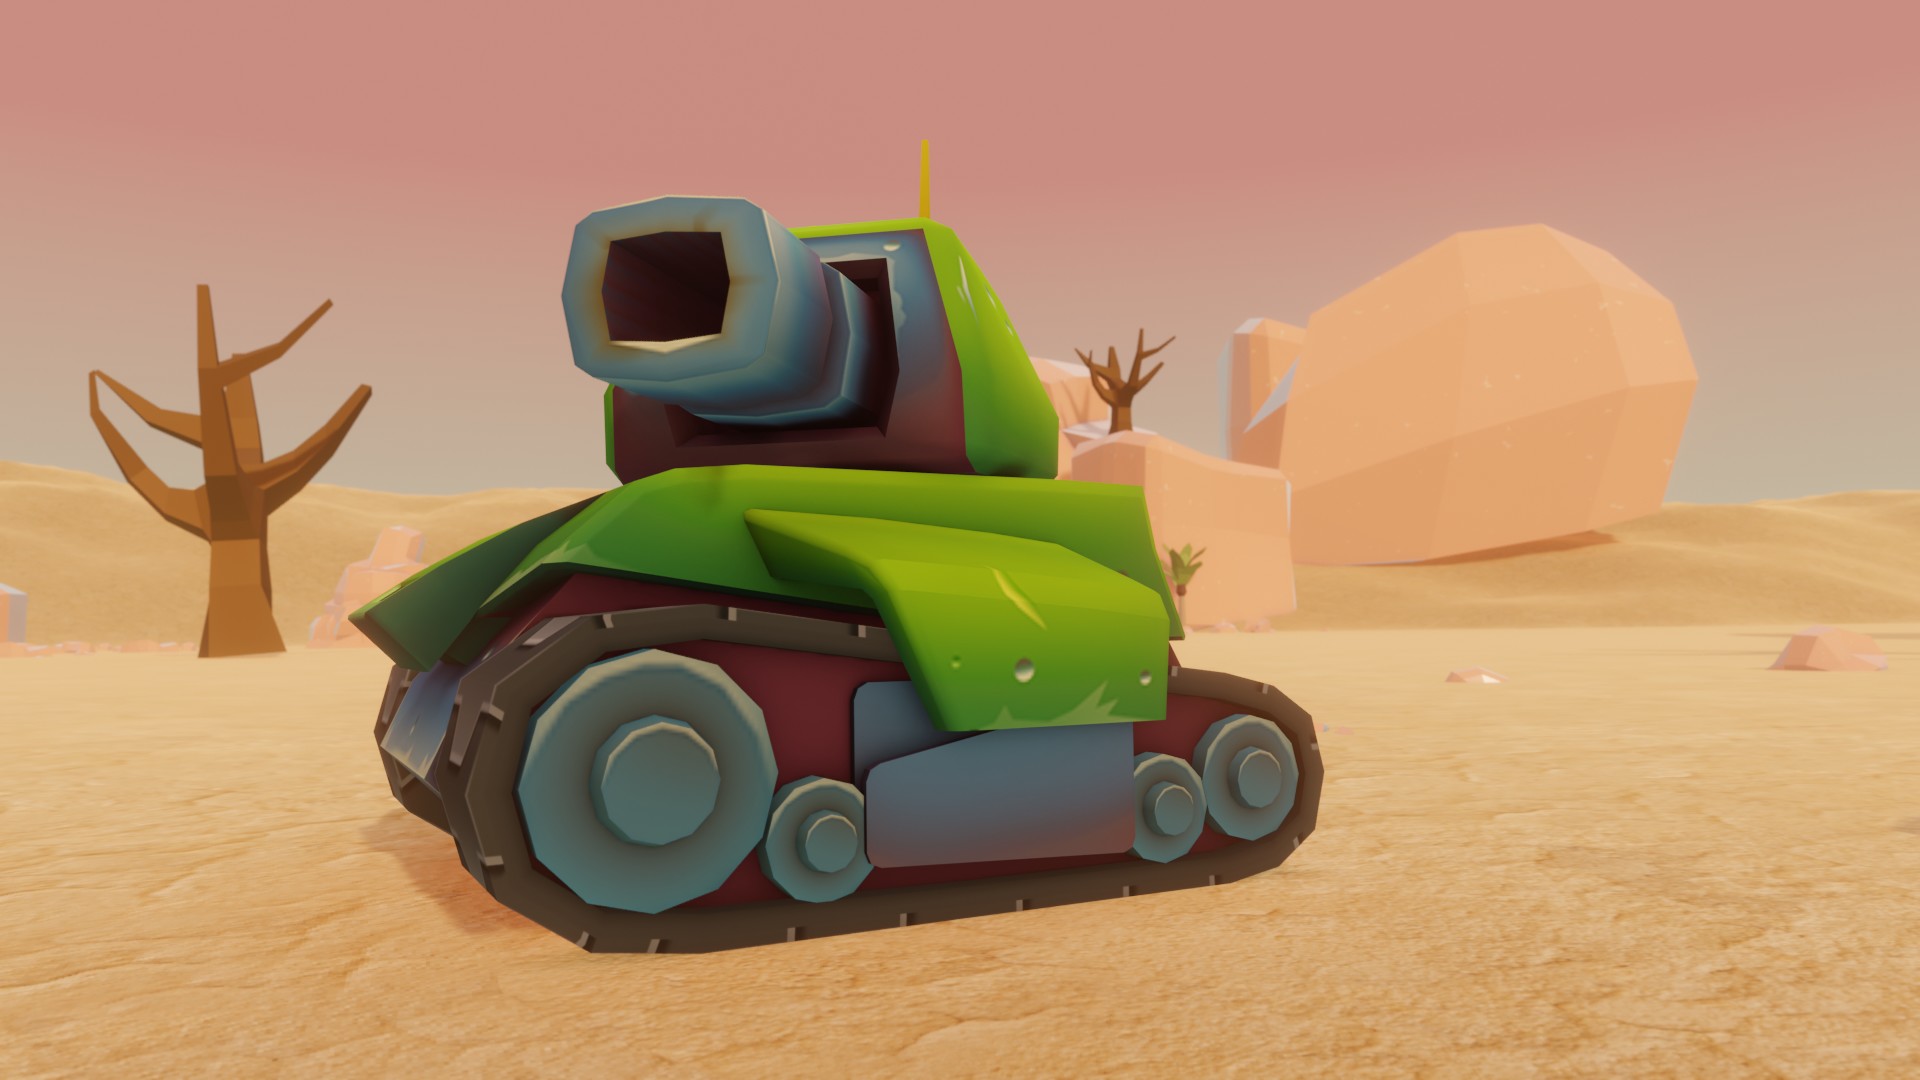
In this article, we tell and demonstrate not only how to capture what is happening, but how to tell the story through the camera; how the angle, shot, and movement of the frame affect the viewer’s perception. We will do this using the example of the characters from our Tanks A Lot! and Stealth Master titles.
The article was prepared by Vladimir Kostyuchenko, our Studio’s Motion Designer.
Basic Rules for a 3D Operator
In the beginning, we will talk about the basic rules that we have established for ourselves, based on our work with different designers and, in particular, their most common mistakes. It’s worth remembering that being a cameraman and director requires higher education, and all the material you learn in 4+ years of training can’t fit into one article or YouTube video. So, we don’t claim to be the ultimate truth and don’t try to cover the whole scope of knowledge. We would just like to create a starting point and show a vector for studying this topic.
Realism in Size and Motion
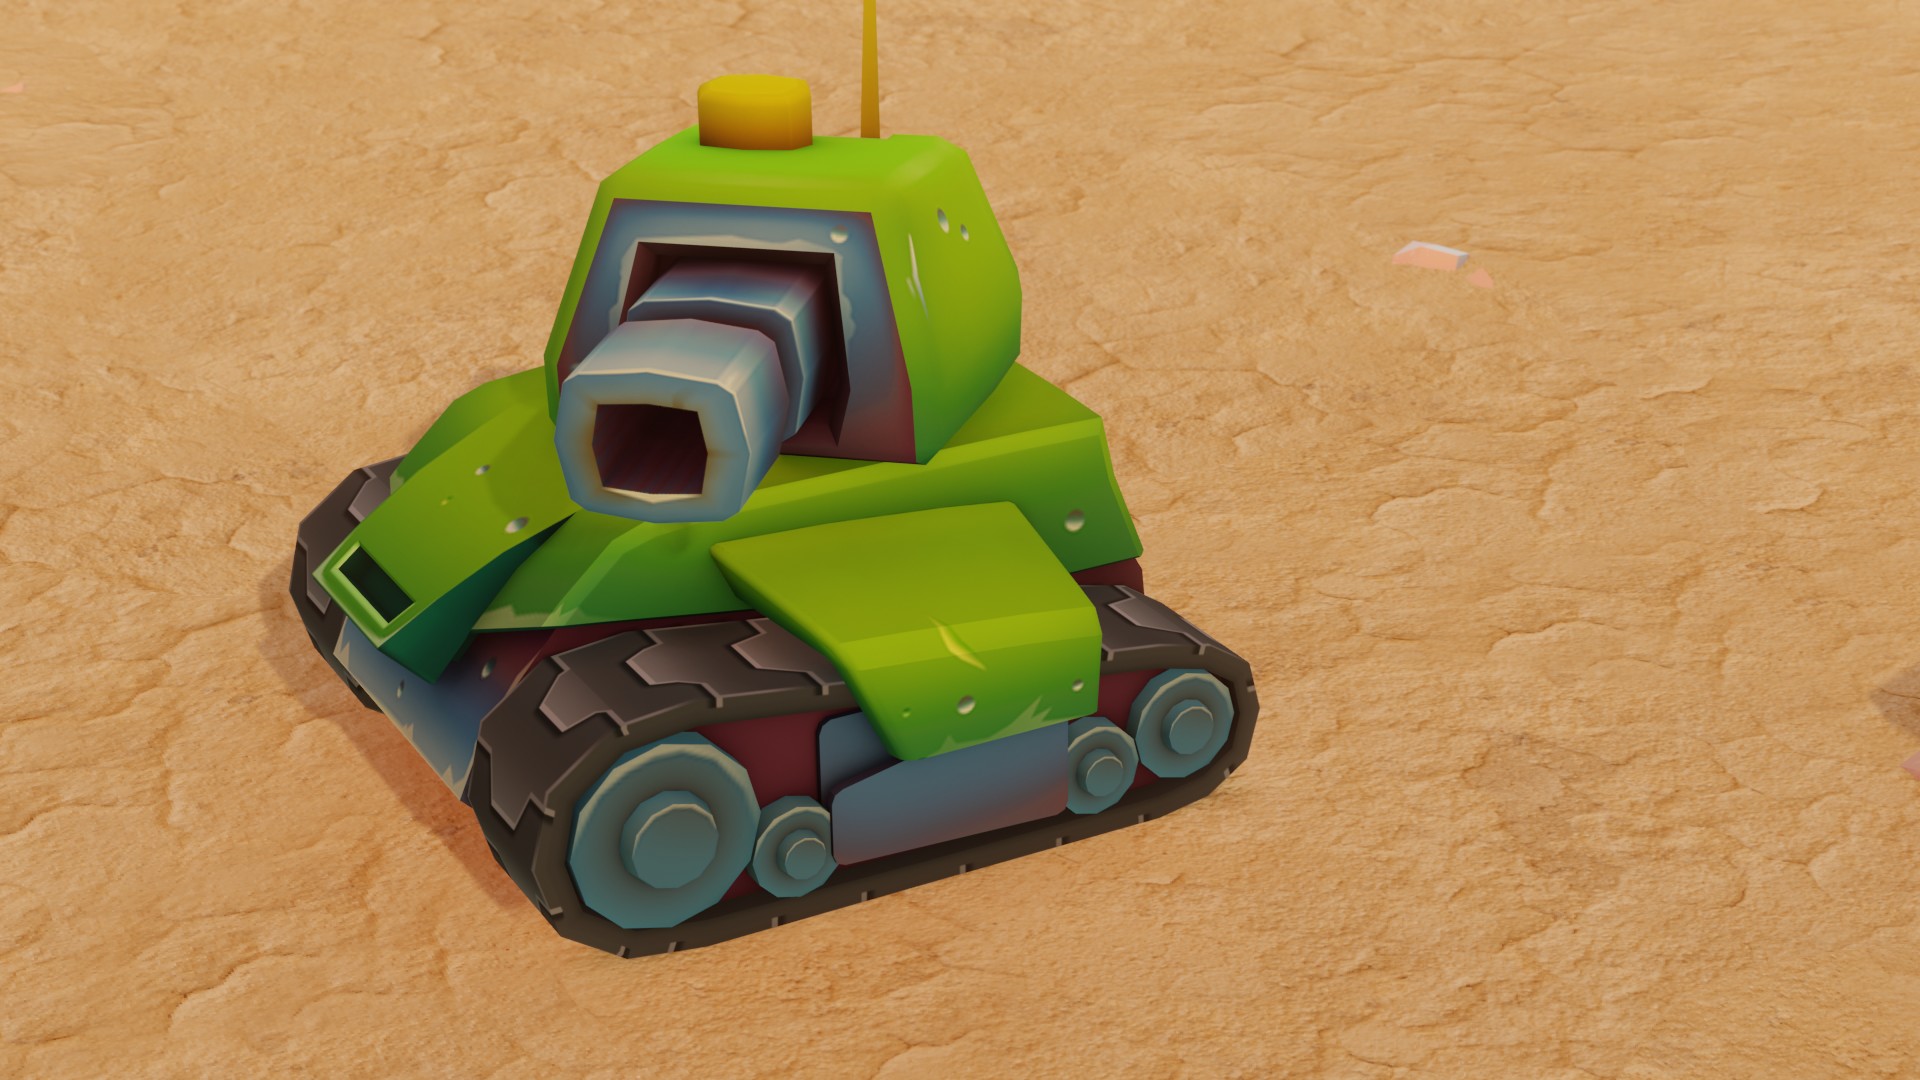
We work with simulated reality. We dictate the rules and create the world in which we tell our story. On the one hand, this is liberating, because we are not limited by the conventions of the real world. For example, we don’t have to fly halfway around the world for the right location, we don’t have to get up at 5 a.m. to shoot the actors in the right light and the right weather.
On the other hand, we can forget about the laws of physics, optics, and dynamics. For example, we make a matchbox-sized tank and build a world of the same size around it. But when we put a camera which by default works with real physical dimensions such as optical distance in millimeters, aperture size, etc., problems begin. The frame seems to be lined up correctly, but the blur seems to be wrong, the tank seems to be distorted somehow. Or vice versa, with an unnecessarily gigantic tank it will also be noticeable.

If the tank is huge, it can be seen by the depth of field and the distortion of the object.

If the tank is tiny, the same rule applies.
The same applies to camera movement. When we create an animation of an explosion, for example, we try to depict a real explosion as much as possible, but then we forget that the camera and the operator also have mass and inertia. And the cameras start to make completely unrealistic flyovers, turns and stops. This can ruin the coolest animation. The camera movement should be more or less even and steady, it should not wobble from side to side, it should not stand on a tripod at first, then suddenly fly up into the sky and hang there again. Conventionally, if we are shooting some big panorama from a bird’s eye view, you have to understand that this was probably shot from a helicopter, it can’t suddenly fly up, then left and down. It’s almost an impossible task for the cameraman to shoot something in those conditions because the body of the helicopter would sway from side to side with that change of motion. That is why such shots are usually shot with the helicopter moving evenly.
One Frame – One Picture
In general, this is the basis for any design. The basics of composition, color combinations, light spots – these are the basic tools of any designer. We will not focus on it too much, as there is a lot of information on this topic, and globally it is common to everyone: artists, all kinds of designers, cameramen, and photographers. It comes from academic painting and spreads further through all kinds of creativity. So, we would recommend to explore this issue in more detail separately, as one article is clearly not enough.
Ideally, our goal is to create a video sequence so that each frame, if paused, could be printed out and hung on the wall. That is why we recommend, after creating an almost finished animation, to pause every 5–10 frames and, if needed, add some details, move some objects in the background, etc. to ‘give more artistry’ to your rendering.
One Frame – One Movement
Each frame should have a clear beginning and a clear ending. If the camera moves in one shot, it should move linearly, from point A to point B, maybe with a slight rounding. The camera should not oppose its movement and draw a crescent. When moving, the camera can turn to one side if you want to focus on some detail, but it shouldn’t rotate back and forth because that would make the viewer dizzy and sick. Another thing is if it’s an artistic trick and the designer wants the viewer to feel uncomfortable.
If the camera moves in one shot, it should move linearly, from point A to point B, maybe with a slight rounding. The camera should not oppose its movement and draw a crescent.
Variety of Shots and Montage of Shots
This is something that novice designers sometimes forget. You don’t have to shoot any scene from a single angle, especially with action scenes. You can show the event itself, the reaction to the event, the effect on the world, and everything from several angles. This will only benefit the story.
You should also keep in mind the rules of editing, to arrange frames so that they ‘dock’ with each other by layout, movement, and attention points. This is also a large layer for a separate article. You can find a lot of information by searching ‘video editing rules’.
Regarding the placement of cameras and shots when you change frames, you have to imagine that this scene is being shot by several operators at the same time. If you simply change the shot or range on static shots, the camera should change its position in space slightly, so that it does not look like a momentary approach to the object. Or we need to control that when we change frames we don’t have the virtual camera from the previous angle. No matter how weird it is, you can’t physically see the camera, but that’s how movies have been filmed for decades, and if there’s an opposing joining of shots as if the camera had done a 180-degree turn around the subject, then it will cut the eye and confuse the viewer. So, it’s easiest to just avoid the appearance of another camera in the frame.
Shots That Tell a Story
Long Shot
An ultra-long shot is needed to show the place and time of the action, so you can’t see the characters in it: they are very small. It is also called a stock shot. It is one that can start the story in a new location. It is more about the location than the characters.

Ultra-long shot.
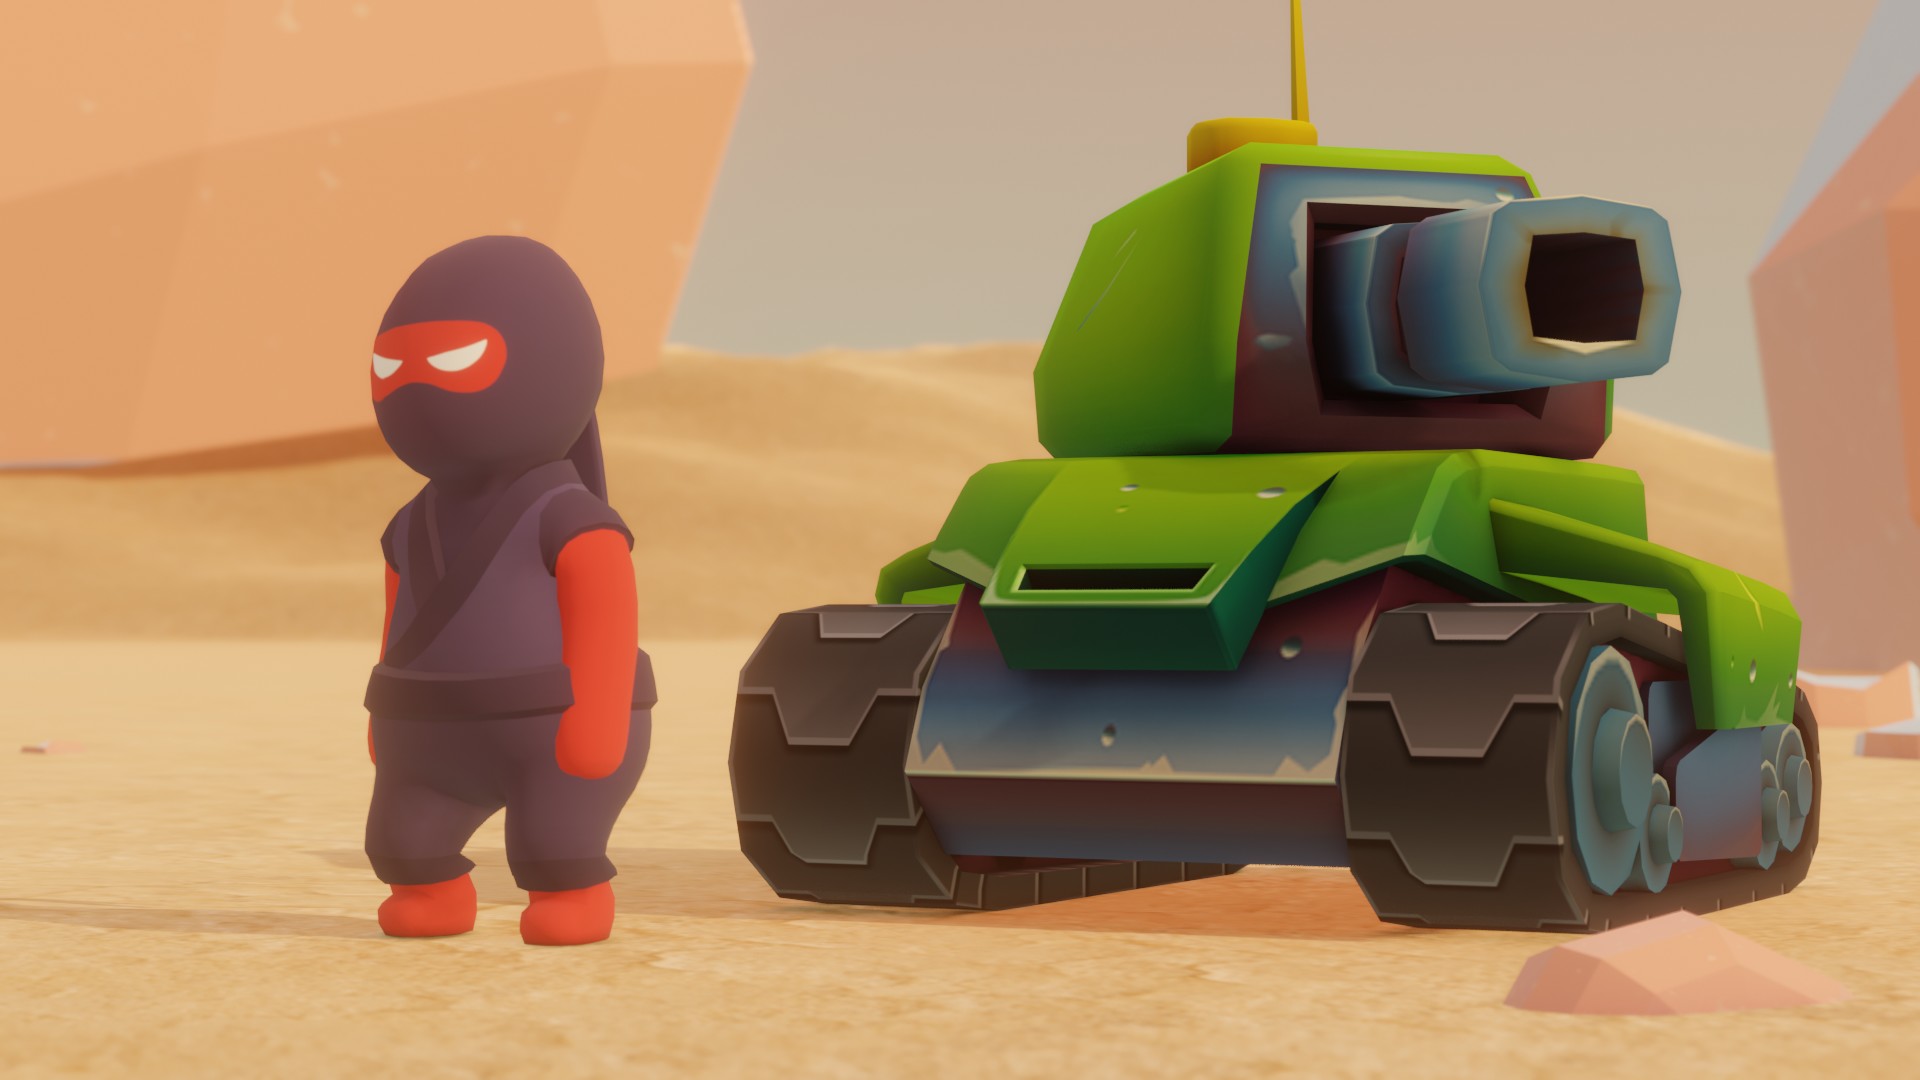
A long shot is about the heroes in the location. The importance of both the location and the hero are equal.
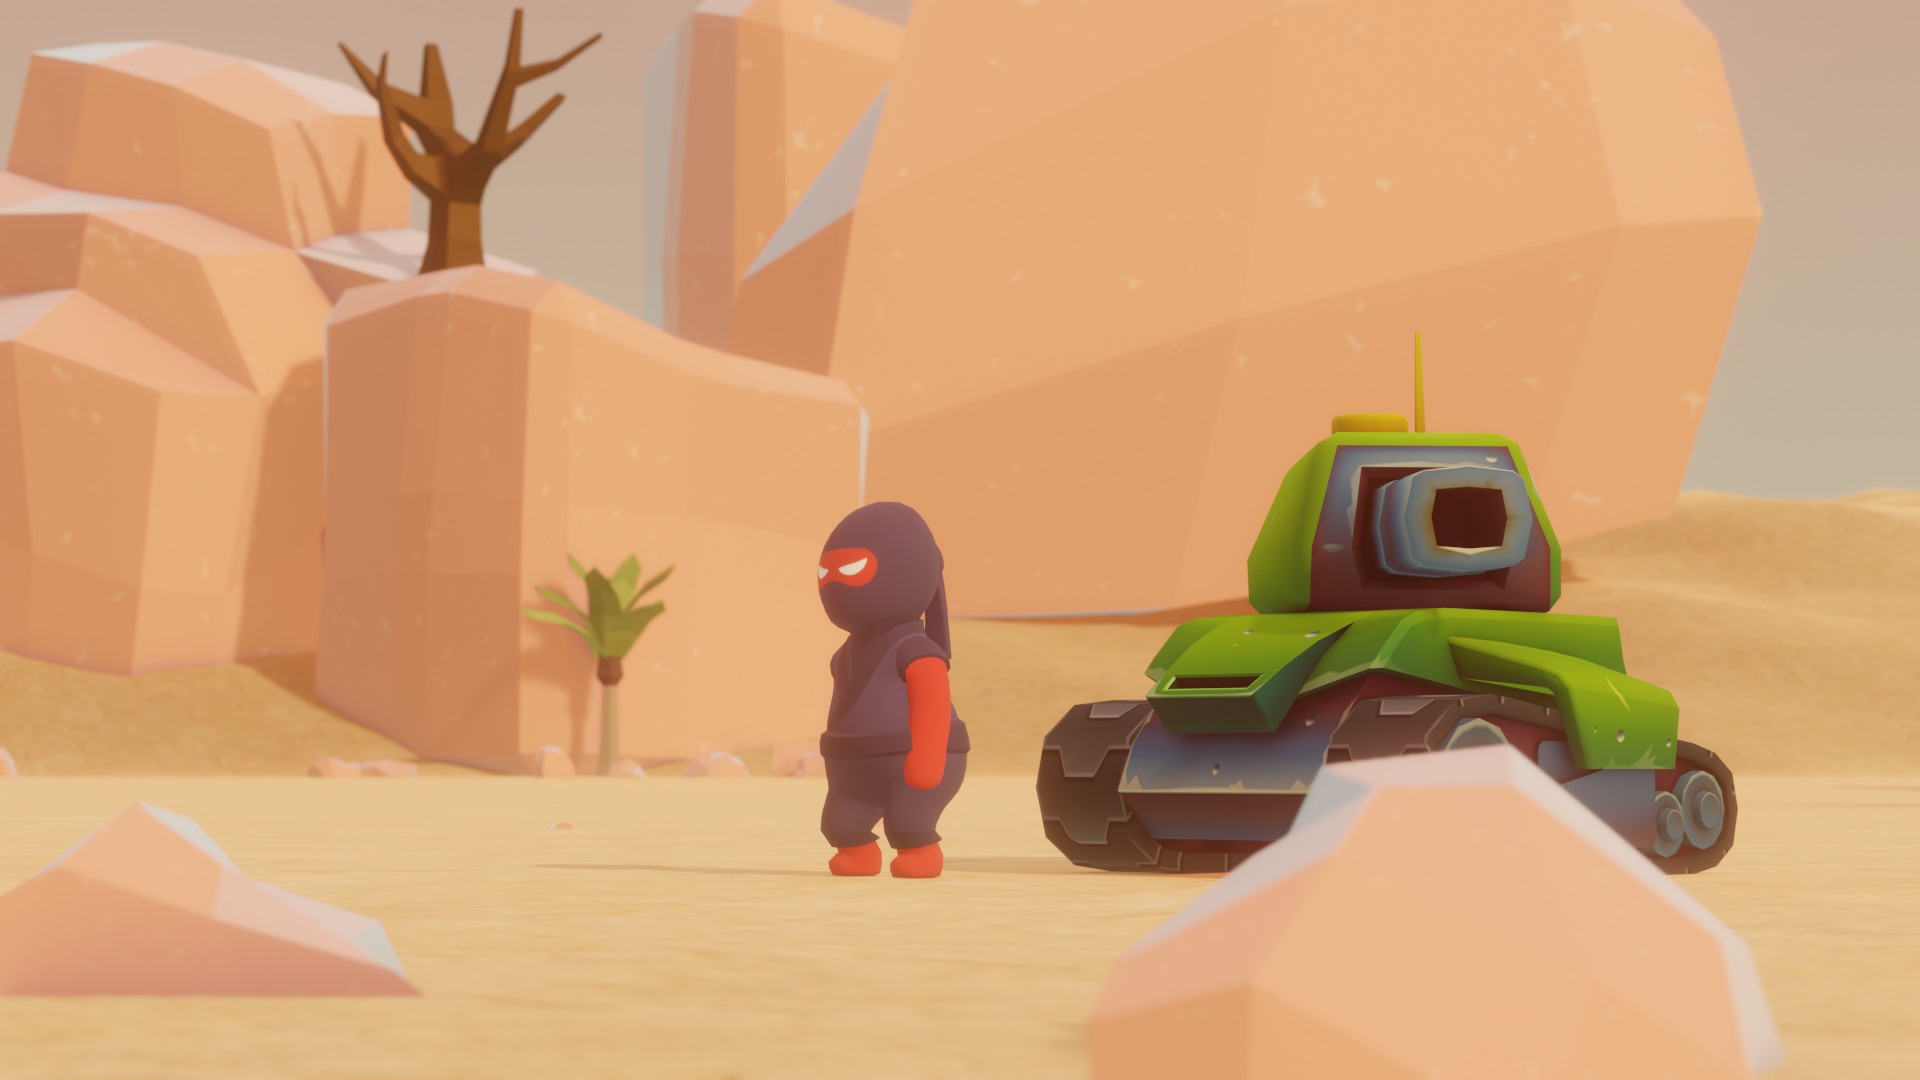
Long shot.
Master shot: although the characters are also shown head to toe, as in the long shot, there is no emphasis on the place of action at all. This shot is purely about the characters and their action. Emotions and reactions are almost unreadable.
Master shot.
Medium Shot
A medium full, or a cowboy shot, shows the hero from about the hips or just above and up to the head and allows you to notice the hero’s emotions, unlike the general scene. This shot came from westerns, where it was important to show the hero from the hips because cowboys carry a gun.
Medium full shot.
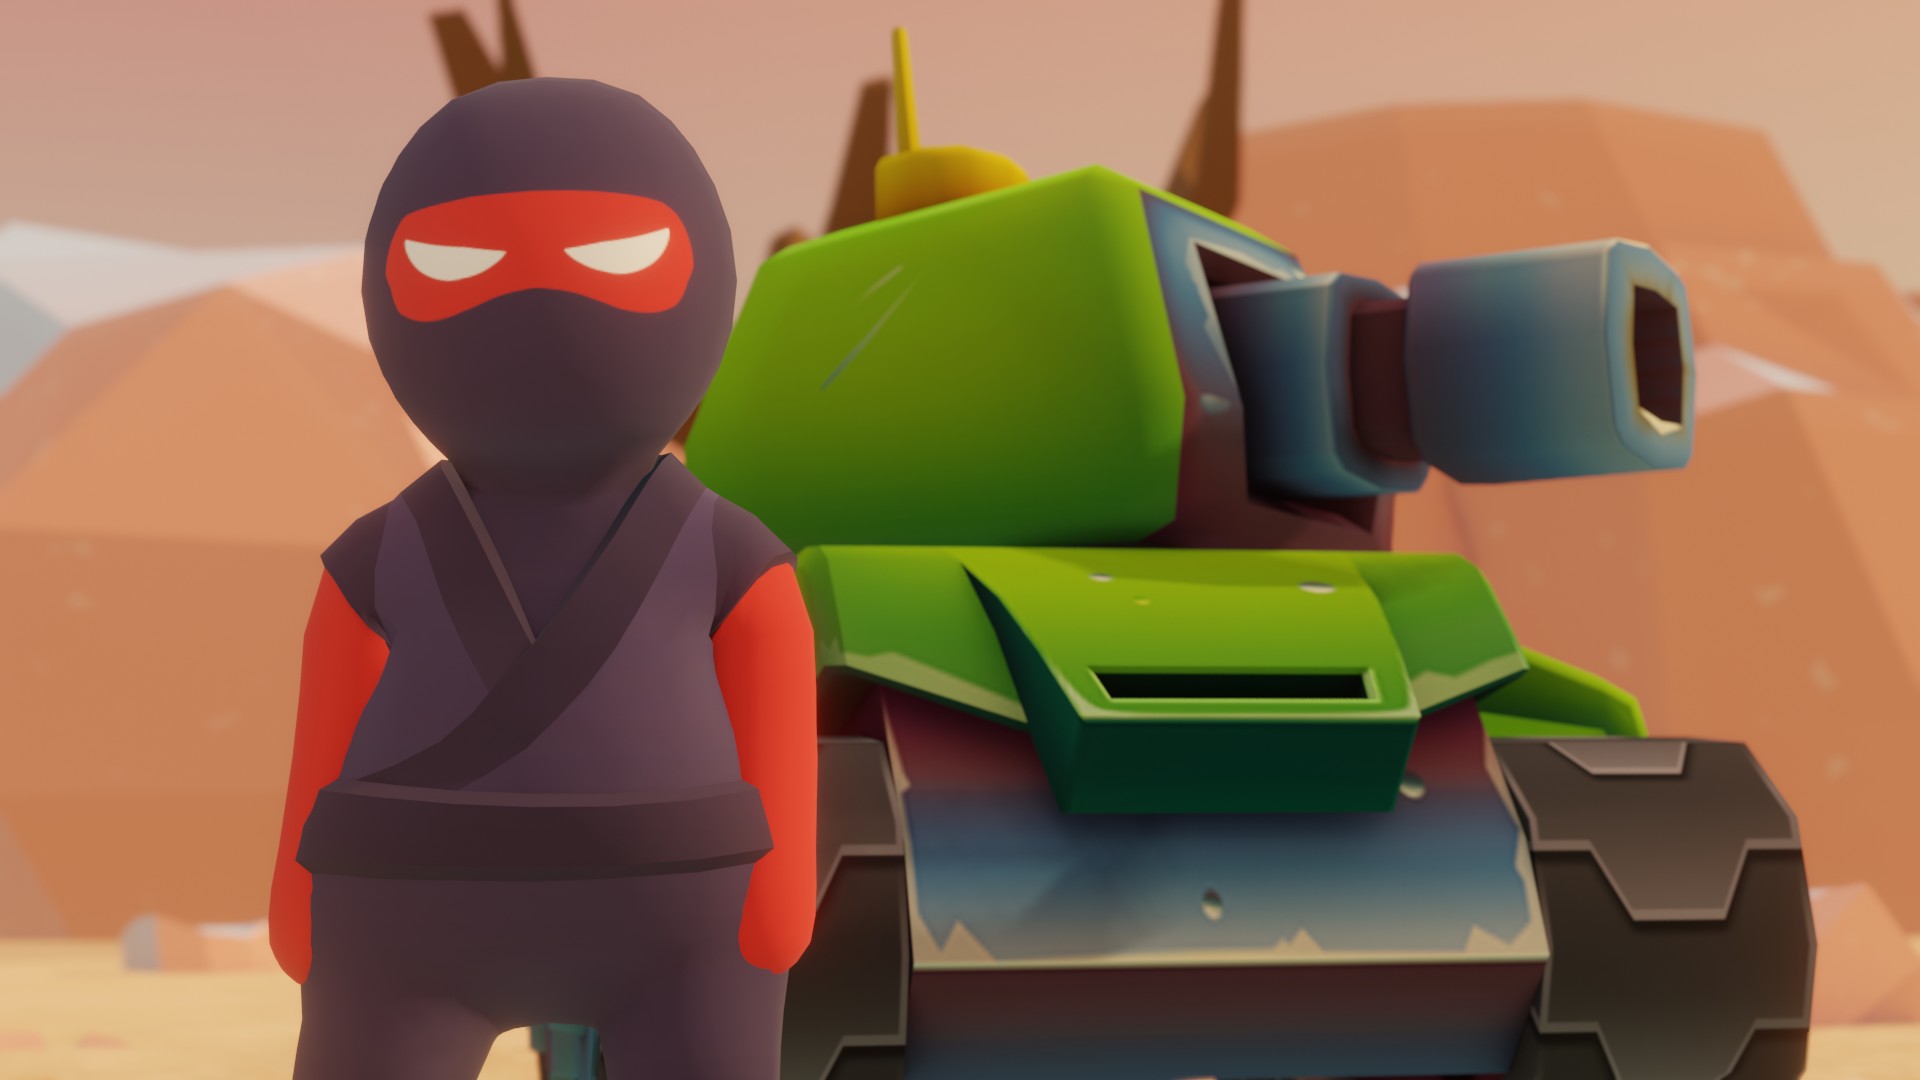
A medium close-up shot shows the character from the chest or shoulder. The viewer can better see the character’s emotions and facial expressions and understand their feelings. Medium close-up shots are good for dialogues.

Medium close-up shot.
Close-up Shot
A close-up shot shows the character above their shoulders and emphasizes their emotions and facial expressions. Close-up shots are also good for dialogues.

Close-up shot.
An extreme close-up shot emphasizes a feature of a character, such as an ear, an eye, or lips, or a feature of an object, such as a piece of machinery. The detail takes up the entire screen.
Extreme close-up shot.
A peculiarity of human perception is that the viewer easily perceives the change of frames, but only when they differ sufficiently from each other in terms of their coarseness.
The Soviet Film and Television Director Alexei Sokolov derived the rule of montage by size through one shot. So, the transition from the general shot to the first medium shot and from the second medium shot to the close-up shot looks comfortable. But the transition from the general shot to the second medium shot and from the medium shot to the close-up shot looks uncomfortable, because the composition in them changes slightly: in the second and first medium shots, the viewer sees the hero with a difference from the hips to the waist.
Something About the Camera Structure
The camera in 3D has quite a lot of settings, and they vary from program to program, from renderer to renderer. But the most important indicator that affects the frame and is present in any camera, both real and virtual, is the focal length. To be nerdy about this, focal length is the optical distance (usually measured in millimeters) from the point of convergence of light rays inside the lens to the camera matrix. Changing this affects the size of the subject in the frame without changing the position of the subject or camera.
With a static camera position, the focal length acts like a normal scaler zoom. But it is necessary to understand that if you change the camera position and angle, the changes will be more noticeable. First of all, it leads to distortion of the image. Below is an example of two general shots of the tank, taken with different focal lengths, and the camera in the first example stands much farther away. Pay attention to how the tank itself is distorted and how the proportions of the background change.
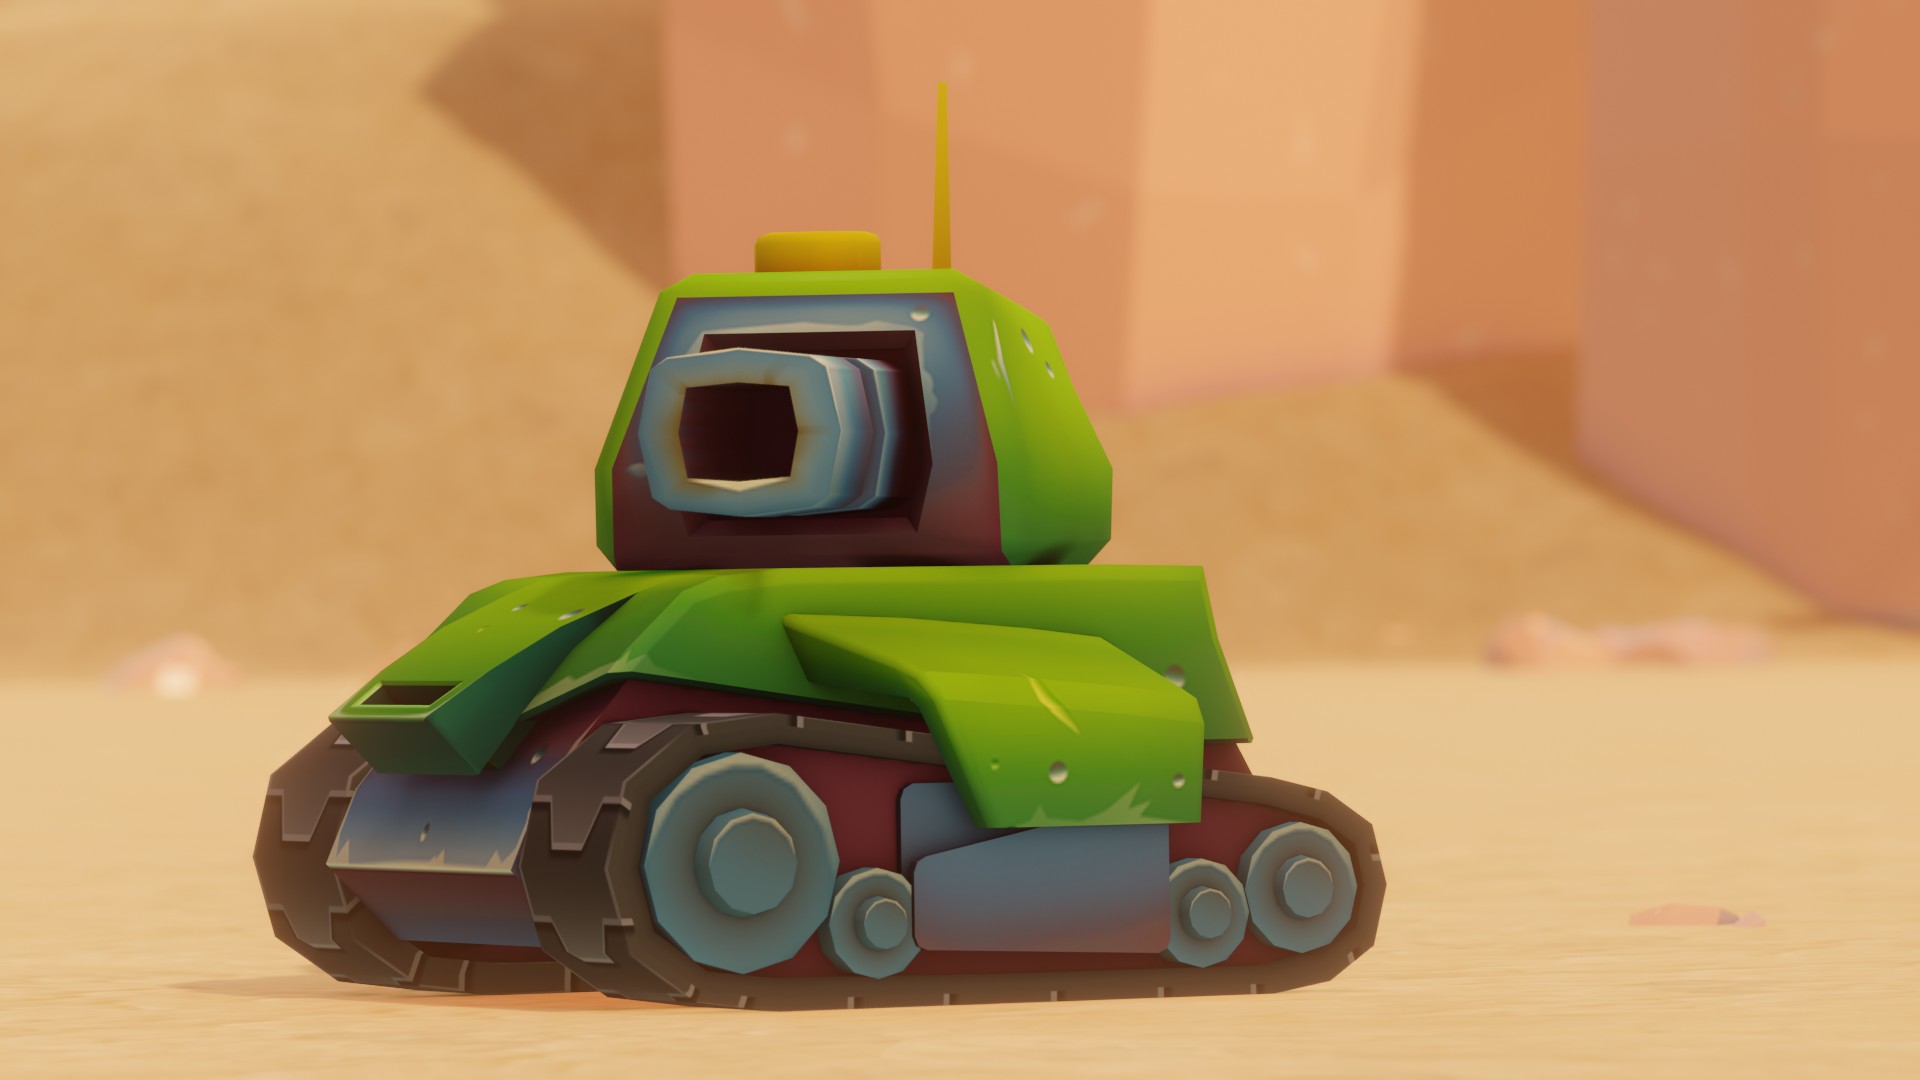
300 mm, the camera is far away from the tank. Rear background is strongly enlarged, the tank is distorted.

18 mm, the camera is close to the tank. There is more of the rear background, the tank is distorted.
Focal length can also serve to tell a story. For instance, in the examples above, it is clear where the virtual viewer is located. In the first shot, we are watching from afar, at the distance of the shot. And the tank in the second shot is dangerously close to us, it can run over accidentally.
The distortion of the subject is better visible on the face. In this example, we simultaneously move the camera to the subject and decrease the focal distance. You can see how the face stretches and the ears ‘hide’ behind the cheeks.
Also, the longer is the focal length, the blurrier is the background behind the subject, all other factors are held equal. This can be used to enhance the artistry of the shot and emphasize the subject.
The maximum natural distortion occurs at a focal length of ~50 mm. This value is closest to human vision. Small focus (less than 35 mm) is good for landscapes: it gives a wide angle of view – it ‘stretches’ the perspective and makes the frame more three-dimensional. High-value focus, or long focus (over 70 mm), is good for details because it ‘compresses’ the space and makes the picture look flatter.
A wide-angle lens shows the location where the tank is located.
Angles That Evoke Emotion
An angle is the position of the camera in relation to the subject: how and where the camera looks, or from where we look at the object.
An angle changes the viewer’s perception because it can enhance or diminish the importance of the character or object shown to the viewer. It all depends on the level of the angle.
A neutral, or natural, angle adds no effect to the subject because the camera is at the same level as the eyes (or in our case the muzzle) of the subject. We perceive the object as equal to ourselves.

A low angle makes the object larger, more important, or even dangerous – the camera looks at the object from the bottom up.
Tank is majestic.

Tank is majestic, but it also threatens us.
A high angle, on the other hand, diminishes the object, makes it less important, weak, vulnerable, or ridiculous – the camera looks down at the object from above, belittling it.
High angle.
Camera Movements That Set Accents
The cameraman is the director’s first assistant. We see the movie through his eyes. He directs the viewer’s attention where we need it. And he does this through the movement of the camera. By simply changing the movement of the frame from left to right, you can completely change the meaning of what is going on and push the viewer to the conclusion we want them to make, to create an attitude toward what is happening.
All frame movements are actually caused by the equipment on which they are shot. As technology advances, there are more and more new kinds of frame movement, like camera cranes, steadicam, camera dollies, and drones. And it is our job to replicate these techniques. If you understand how and with what a real movie is shot, it becomes a lot easier.
A static shot is a shot in which the camera position does not change. The camera just stands on a tripod and shoots actual reality. It seems to be the easiest shot, but in fact, in our opinion, it is very much not. As there is no movement in a static shot to put accents on it, a static shot does not give you an estimate: the viewer highlights what is important and analyzes what is going on in the shot. It is suitable for tense action or dialogues.

Panning is shooting with the camera rotated vertically or horizontally. The camera is stationary on a tripod and the rotation is performed by rotating the tripod head.
A simple horizontal and vertical panorama moves the viewer’s attention from one object to another object or accompanies the object to give the viewer a better view.

Horizontal panorama shows a character going somewhere.
-min-1692096576.gif)
Horizontal panorama shows a character who notices enemies.

Vertical panorama shows the character who sees something to his left and then pulls out a grenade. It means that the character sees something or someone dangerous to his left.
Horizontal and vertical panoramas can be combined to put accents and change the narrative.

Panorama shows the character and then shows his weapon. It means the character is going to shoot someone.

The panorama shows a character sneaking around. The camera goes up and the viewer sees the weapon: that means the bandit is sneaking around. The camera rises again, and the viewer sees the bandit’s face.
The flip panorama shifts attention from one subject to another.
The flip panorama first shows the bandits, then the hero, then the bandits again, and then the hero’s grenade. The viewer understands that the hero notices the enemies, they are approaching, but the hero is ready to fight back. There is an emphasis on the fact that time is running out.

A camera dolly is needed for smooth filming in motion. Usually the dolly is mounted on rails, although most dollies have rubber wheels for filming on any surface.
Dolly is handy for filming stock shots to show the location before the action starts in the frame.
The movement of the camera changes the focus of the shot. In this fragment the character notices enemies and takes out a grenade, but the camera keeps moving toward the enemies, which means they are advancing and the character is in danger.

If you let the camera go in the opposite direction, you get a different story. The viewer sees that the character notices enemies, and then arms himself. The camera focuses on the character: he is ready to fight back.
The dolly can be pulled up to the subject to accentuate his action. In this snippet, the character is not just ready to fight back – it looks like he came up with something special and pulled out not a random grenade.
Here the character looks less confident. He has a shot, but he seems to be preparing for one last fight. There is a sense of hopelessness in him.

The dolly is comfortable to follow the subject. This fragment may look a little comical, and our bandits are not so scary anymore.

Due to the jolting effect, the shot looks like the tank is being shot from a car that is traveling parallel to the tank.
Camera shifting, or zoom. Zoom is used less and less frequently and is often replaced by a dolly. The zoom effect is achieved by changing the focal length of the camera. Smooth or sharp. In real life, it can now be seen in the filming of car chases or sporting events, such as Formula One races. When the operator has no possibility to change his position in space, but needs to shoot something here and now.

While the tank is moving towards us, we smoothly decrease the focal length, so that the tank occupies the same space in the frame.
You can also simulate ‘mistakes’ of the operator. Usually, these moments are cut out in editing, as it is a flaw. But sometimes they appear in live broadcasts. Using these techniques, you can add dynamics to the scene and create the effect of a real-time event.

A sharp zoom creates a live shot effect: it seems as if the real operator has sharply pulled the zoom ring of the camera.
The sharp zoom can be complicated by losing focus of the subject for a moment.
A Dolly Zoom, or a Vertigo effect, is an effect that changes the background but does not change the subject in the foreground. To get the Dolly Zoom, you need to move the camera and change its focal length at the same time. If the camera moves toward the subject, the focus must decrease, and if the camera moves away from the subject, the focus must increase. It is usually used to emphasize a strong change in the character’s inner world. Something happened that fundamentally changed his perception of reality.
The camera moves toward the character, and the focal length decreases – the background becomes distant. It seems that the character is fully concentrated and ready to kill.

The world around the character expands. It seems that the character has learned something that has turned his mind upside down. The effect is slightly different.
If you tilt the camera, it seems as if the character is in an altered state of consciousness, for example, on drugs.
A steadicam is a mechanism with a system of mechanical or electrical stabilizers that compensate for jolts from the operator’s footsteps or uneven motion surfaces. It is attached to the operator or any other moving object, such as a motorcycle.
Steadicam is convenient to follow characters when they move unpredictably or in complex spaces like corridors, stairs, and passages. Steadicam is often used as a ‘subjective camera’: when the viewer observes events either from the perspective of the object, or from the perspective of the observer, who is as close to the object as possible. This requires the operator to hold the camera at the eye level and shake the camera to make it appear as if it is naturally following the subject.

The viewer follows the character rather than watches him.
The viewer runs along with the characters – he is also on the battlefield.
-1692098448.gif)
And here you can see that the villain is sneaking up on the character, he is preparing for this fight, but it does not help much, because the threat from the other side is looming.
A camera crane allows you to shoot from a height and makes static scenes more dynamic and expressive. A crane is convenient to shoot large locations where a lot of people gather: TV shows, concerts, or sports competitions.
-1692098507.gif)
Despite the fact that the crane moves to the left and the camera moves to the right, there is no chatter in the frame, it is comfortable to watch. They shoot TV shows with a crane, and the viewer is used to this perspective and movement.
A SnorriCam, or a body mount, is attached to the subject and shows it close-up shot. Usually the body mount emphasizes a severe emotional or physical condition of the subject, such as a stressful situation, a hangover, or a drug trip. It is also attached to moving objects, as in extreme photography. GoPro action cameras are often used as a SnorriCam because they are ultra wide-angle, and the body mount should catch maximum details, capture maximum information. So, it is worth taking this into account and set the focal length of the camera to 15–25 mm.
Shaking makes the picture more natural: it looks like the camera is really hanging on the tank.
-1692098725.gif)
You can also mount the camera not to a moving, but a rotating object.
-1692098782.gif)
Usually a body mount emphasizes a heavy emotional or physical state of the subject.
-1692098833.gif)
If you hang the camera on the weapon, the scene will be more dynamic and spectacular.
We can separately combine a large amount of filming types which are not performed by professionals, but can also be used in the production of videos. These are surveillance cameras, phones, handheld cameras, drones, satellites, GoPro, WebCam, etc. It is important to convey the manner of filming with this equipment, and you can emphasize the effect with UI elements.

Let’s summarize. Watch good movies, read books on directing, editing, and camera work, let professional cameramen see your work, and develop your skills. If you have anything to add/correct, welcome to the comments.